%20(4).png)

JLB Paver Sealing is providing Clay, Duval, and Saint Johns counties with Paver Transformations!
When we combine our acute attention to detail with full paver restoration, the results are night and day.
This website serves as an easy to understand guide to our specific process.
After you have a chance to review our process, call or text to schedule a free in person consultation.
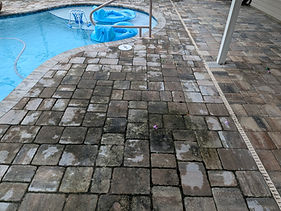
Step 1: Cleaning Your Pavers
Before the magic can happen, your pavers must be stripped of dirt , organic growth, and any old joint sand.
Your pavers are treated for algae and weeds. Appropriate pressure is applied to completely clean off the pavers and the joints. Some stains require additional treatment to lighten.
Step 2: Repairing The Base & Edging
If your pavers are raised, sinking or falling, you may need to repair the base and concrete edging.
Releveling the base beneath will return your pavers to a clean and uniform look. replacing any broken concrete edging will lock them in and prevent further movement.

Step 3: Replacing The Joint Sand
Choosing a matching sand color will greatly enhance the look of your hardscape as well as preventing movement.
Choose one of our 6 premium color options to compliment your pavers. A low contrast color combination can make your surface appear clean and solid.

Step 4: Sealing The Pavers And Sand
This is where the magic happens. The sealer not only enhances the vibrance and color of your pavers but also protects from algae, fading, and stains.
The sealer also stabilizes the joint sand to prevent washout and minimize weed growth. Choose a gloss or matte finish. Added grip is also available.

Step 5: Enjoy
You may find yourself relaxing outdoors at sunset and entertaining more guests than before but that's normal.


